Ultima Guida per Principianti: differenze tra le versioni
m (Super.Mario ha spostato la pagina Ultimate Guida per Principiante a Ultima Guida per Principianti) |
Nessun oggetto della modifica |
||
| Riga 2: | Riga 2: | ||
{{InTraduzione}} | {{InTraduzione}} | ||
<font size="4">'''Ultima Guida per | <font size="4">'''Ultima Guida per Principiati'''</font> <div style="margin-top:2px;"></div> | ||
Guida creata da Osl112. | Guida creata da Osl112. | ||
| Riga 894: | Riga 894: | ||
==Scambi commerciali== | ==Scambi commerciali== | ||
In Grepolis puoi scambiare risorse con altri giocator (attraverso il [[Mercato]]), con villaggi rurali (direttamente dalla panoramica dei [[Farming_(2.0)|Villaggi rurali]]) e con il [[Commerciante Fenicio]]! Tuttavia, devi essere sicuro che sia un buon affare, se no rischi di avere una carenza di risorse! | |||
Lo scambio commerciale è fondamentale nell'avanzamento del gioco, anche scambiando le risorse meno utili tra le tue stesse polis. | |||
=== | ===Scambi commerciali con altri giocatori=== | ||
To trade with other players, you must have a marketplace level 5, or level 10 to trade with players on other islands. In the marketplace, you can create offers to trade a certain amount of one resource for a certain amount of another, or alternatively, accept another players offer. You don't have to do a complete offer either, you can do a part exchange of resources too. Note that this isn't instant and it will take time for the resources to be transported to your village. | To trade with other players, you must have a marketplace level 5, or level 10 to trade with players on other islands. In the marketplace, you can create offers to trade a certain amount of one resource for a certain amount of another, or alternatively, accept another players offer. You don't have to do a complete offer either, you can do a part exchange of resources too. Note that this isn't instant and it will take time for the resources to be transported to your village. | ||
| Riga 904: | Riga 904: | ||
*The lower the ratio, the better the deal for you! | *The lower the ratio, the better the deal for you! | ||
[[File:MarketOverview.png| | [[File:MarketOverview.png|720px]] | ||
If you see an offer you like, it is as easy as clicking the tick! Alternatively, press the down arrow when you scroll over the offer to do a part offer. | If you see an offer you like, it is as easy as clicking the tick! Alternatively, press the down arrow when you scroll over the offer to do a part offer. | ||
=== | ===Scambi commerciali con villaggi rurali=== | ||
You can also trade with farming villages. Every farming village can trade a certain resource for another resource at a starting ratio of 1:1.25, although this will decrease as you trade more with the farming village. However, it does replenish over time. | You can also trade with farming villages. Every farming village can trade a certain resource for another resource at a starting ratio of 1:1.25, although this will decrease as you trade more with the farming village. However, it does replenish over time. | ||
| Riga 918: | Riga 918: | ||
To get this overview, click on the farming village you wish to trade with and then press the trade button. You may only trade with the farming village if its mood is over 80%. | To get this overview, click on the farming village you wish to trade with and then press the trade button. You may only trade with the farming village if its mood is over 80%. | ||
=== | ===Scambi commerciali con Velerios (Il Commerciante Fenicio)=== | ||
The last method of trading is through Velerios, the Phoenician Trader. In order for him to visit your village, you need to have a harbor. | The last method of trading is through Velerios, the Phoenician Trader. In order for him to visit your village, you need to have a harbor. | ||
Versione delle 00:13, 21 apr 2013
|

Ultima Guida per Principiati
Guida creata da Osl112.
Questa guida di base vi aiuterà nei primi passi verso la gloria in Grepolis. Questo vi insegnerà le basi e un paio di tecniche avanzate, in modo che tu possa diventare un maestro del gioco, aiutato dagli per essere il dominatore in molte città. Questa guida può sembrare lunga, ma non si deve leggere tutta in una volta sola. Questa guida vi insegnerà passo per passo come giocare in Grepolis.
Ogni tanto, vedrete piccoli riquadri colorati che contengono diversi suggerimenti e consigli da giocatori esperti nel gioco per aiutarti nella ricerca per diventare un eroe greco. Ogni colore indica un diverso tipo di suggerimento.
Verde- Top Suggerimento: Questi suggerimenti consentono di ottenere il massimo del gioco così come consigliato, con qualche suggerimento.
Rosso- Cosa fare più avanti: prossimo passo? Vuoi aiuto su dove andare dopo? Questi riquadri vi daranno suggerimenti su ciò che potrebbe essere il prossimo obiettivo.
Blu- Per sapere di più: Questi si collegano ad altre pagine della wiki che vi daranno maggiori informazioni su un argomento, se necessario.
Lo scopo
"Per gli uomini coraggiosi, i premi che offre la guerra sono la libertà e la fama." - Licurgo di Sparta
Il tuo obiettivo è quello di diventare uno dei guerrieri più forti, per diventare un eroe! Devi camminare fiero e a testa alta tra il resto e lavorare con la tua alleanza per costruire le possenti meraviglie del mondo , mentre si combatte il feroce nemico. Puoi incontrare nuovi alleati, incontrare nuovi nemici e nuove persone. Puoi fondare o conquistare le tue polis. La parte più bella è che ti divertirai!
Mondi
"Contro il pericolo si paga per essere preparati." - Esopo
Ci sono molti valori diversi che fanno differente un mondo da un'altro. Puoi sempre leggere le statistiche di un mondo sulla wiki, nei mondi in cui giochi già e nei mondi in cui giocherai, così da fare la scelta migliore per voi.
La tabella seguente contiene tutti i paramentri e il loro significato
| Impostazione | Che cosa significa |
|---|---|
| Velocità del mondo | La velocità del mondo è la velocità di gioco del mondo stesso. La velocità di base è 1, se il mondo ha la velocità 2 significa che è 2 volte più veloce del mondo 1, se ha la velocità 3x significa che e tre volte superiore alla velocità 1.
La velocità del mondo determina i tempi di costruzione degli edifici e la produzione di risorse, ma anche la produzione di favori divini. |
| Velocità Unità | Questa impostazione dermina la velocità di spostamento delle unità da una polis ad un'altra. L'impostazione di base è 1, ma come la velocità del mondo, se è 2 significa che è 2 volte più veloce rispetto a 1, e cosi via. |
| Protezione Principiante | La protezione principiante inizia all'avvio di un mondo. Questa impostazione permette di non essere attaccati durante il periodo indicato.
Se vi siete da poco registrati in un modo è probabile che la protezione principianti non sia ancora finita. |
| Morale | Il morale indebolisce il vantaggio di un player forte che attacca un player fortemente più debole. Le truppe del player più forte non si sentono abbastanza motivate per combattere al pieno delle forze. |
| Limite alleanza. | Questa impostazione determina il numero massimo di player in un'alleanza. |
| Sistema di conquista | In Grepolis, ci sono 2 tipi di conquista. Il vecchio sistema di conquista ed il nuovo sistema. Il vecchio sistema indica la conquista con assedio, invece il nuovo sistema di conquista indica la conquista con rivolta |
| Versione | Questa impostazione determina la versione di gioco. Recentemente e stata rilasciata una nuova versione di gioco, cioè la versione 2.0 per tutti i mondi di gioco. |
Queste impostazioni sono decise dalla InnoGames, la società che ha programmato Grepolis. Nuovi mondi con diverse impostazioni verranno rilasciati ogni tanto.
Ora che sapete che cosa vuol dire ciascuna impostazione, si potrebbe desiderare di guardare le impostazioni dei vari mondi.
| Per sapere di più:
Alpha; Beta; Gamma; Delta; Epsilon; Zeta; Eta; Theta; Iota; Kappa; Lambda; Mi; Ni; Xi; Omicron; Pi; Rho; Sigma; Tau; Iperborea; Ypsilon; Phi; Chi; Achille |
| Cosa fare adesso:
Se non vi siete registrati e quindi non avete aderito a nessun mondo questo è il momento per farlo. |
Interfaccia
"Dieci soldati saggiamente guidati ne batteranno un centinaio senza testa." - Euripide
Il primo passo per diventare una leggenda è quello di conoscere l'interfaccia. Utilizzando l'interfaccia, si può guardare attraverso terre, controllare gli attacchi e, soprattutto, controllare la vostra polis!
Dopo l'accesso per la prima volta, inizierete ad abituarvi all'interfaccia del gioco. Se conoscete già la panoramica potete saltare questa sezione della guida.

Questa è la tua visione d'insieme principale. Qui potete vedere il resto del mondo! È anche possibile vedere la quantità di risorse nel vostro villaggio attuale, i rapporti che potresti avere e i link ad altre pagine chiave. Tutte le informazioni chiave sono qui, la tabella qui di seguito vi spiegherà tutto quello che vedi in giro nella panoramica:
| No. su Screenshot | Che cosa è | Che cosa significa |
|---|---|---|
| 1 | Nome città | Hai la possibilità di cambiare il nome della tua città nell'angolo in alto a sinistra, con un doppio click il nome sarà mostrato sul papiro. Se clicchi solamente una volta verranno visualizzate tutte le tue città in una lista. Cliccando i nomi nella lista sarai trasportato nella mappa della città selezionata. |
| 2 | Barra rapida | La barra rapida mostra tutte le tue più importanti attività delle truppe e dei commerci, ordini di costruzione ed alcune altre utili funzioni. Partendo da sinistra: l'icona con la lente d'ingrandimento e la casa vi porteranno alla panoramica città. Le due frecce vi permetteranno di spostarvi tra le vostre città. Se hai attivato l'amministratore avrai inoltre la possibilità di usare il notepad e la panoramica cambiamenti. Il notepad è utilizzabile cliccando l'icona con la penna ed i fogli di carta. L'icona dei prospetti ha la forma di un occhio circondato da un triangolo. Ha la funzione di fornire utili fogli di calcolo, nonché la panoramica militare ed economica. Le icone successive sono per le truppe in addestramento, l'attività delle truppe e le attività commerciali, che vengono visualizzati in una scheda separata. Il numero di attività è visualizzato accanto a ciascuna icona. |
| 3 | Risorse nel magazzino disponibili e popolazione | In alto a destra dello schermo puoi vedere le tue attuali risorse: legno, pietra e argento. Il numero rappresenta le risorse attualmente a disposizione della città. La barra a forma di "C" che circonda le risorse rappresenta la disponibilità di magazzino. Da notare che sullo screenshot, la pietra è quasi vuota, mentre argento e legno stanno occupando un quarto del loro spazio potenziale. La barra della popolazione, e la barra dei favori che si trovano accanto alle risorse vengono visualizzati allo stesso modo. |
| 4 | Divinità/Truppe | Nell'angolo in alto a destra dello screen viene visualizzata la divinità scelta. Poco sotto se si clicca sul fulmine verranno mostrati gli incantesimi che possono essere attivati sulla propria città. Le tue truppe a disposizione all'interno della tua città attiva sono visualizzate sotto l'immagine della divinità in un menu espandibile. Se si fa clic sulle truppe, e si seleziona una destinazione, sarai in grado di vedere quanto tempo ci sarebbe voluto per le vostre truppe per arrivare lì. Uno strumento utile per pianificare attacchi coordinati tempo. Ricordati che le unità di terra (eccezion fatta per le unità volanti) non possono viaggare senza navi da trasporto fuori dall'isola. |
| 5 | Minimappa | La minimappa è posizionata direttamente sotto la pergamena del nome della vostra città. E' una versione compatta della mappa. Con un doppio click nella mappa potrai visualizzare un area più grande della mappa. Per ingrandire ancora basterà un doppio click della zona che vorrai osservare. In basso saranno visualizzate le coordinate x e y. Per andare a delle specifiche coordinate è necessario inserire il numero delle coordinate nei campi e selezionare la freccia "Salta a queste coordinate". Il pulsante successivo ti permette di salvare una posizione, salvandone le coordinate. Il terzo pulsante mostra il significato dei colori nella mappa, i quali sono stati assegnati dalle alleanze. L'ultimo pulsante ti trasporta alla città attuale. |
| 6 | Premium | Qui sono elencate tutte le funzioni premium nel tuo mondo di gioco. Tutte le funzioni attive sono mostrate colorate; tutte quelle inattive sono mostrate in grigio. |
| 7 | Barra di menu | Tutti i link si spiegano da soli e portano ad alcune funzioni di gioco di Grepolis. Per esempio: Report, Impostazioni, Profilo, Forum Alleanza e Chat. |
| 8 | Notifiche di gioco | Nuove notifiche di gioco, per esempio report di attacchi saranno mostrati sul lato destro dello screen con un piccolo pop-up di notifica. Queste notifiche possono essere cancellate una alla volta o tutte insieme. Inoltre collegano direttamente ai rispettivi report o messaggi. |
Avrai notato la mappa nel centro dello schermo. Questo è lo sfondo, la mappa principale e si può scorrere intorno a guardare l'ambiente circostante.

Si può notare che alcuni dei villaggi hanno un aspetto leggermente diverso. La seguente tabella spiega questi villaggi.
| Villaggio | Tipo | Descrizione |
|---|---|---|

|
La tua polis | Questo è la vostra polis. Inoltre la polis che state controllando sarà circondata da un anello bianco. |

|
Polis di altri player | Questo è la polis di un altro giocatore. Si può inoltre notare che è leggermente più grande della tua in questo momento. Questo è perché le polis cambiano aspetto se crescono di punti. Infatti più punti hai e più l'immagine nella mappa della tua polis sarà grande. |

|
Polis di altri player | Ancora una volta, questa è una polis di un altro giocatore, anche se ha una leggera differenza. Si può notare che ha una spada sulla bandiera. Questo significa che il player appartiene ad un'alleanza. |

|
Polis fantasma | Questo e una polis fantasma. Le polis fantasma erano polis utilizzate da player che hanno deciso di ricominciare o che hanno abbandonato il gioco. Queste polis sono facili da conquistare. |
| Fondare polis | Questa bandierina indica che in quel spazio di può fondare una nuova polis, cliccando su di essa. | |
| Villaggi rurali
In grepolis esistono anche altri tipi di villaggi che vengono controllati dal gioco. Questi villaggi a differenza delle normali polis si trovano all'intero di una isola e non nei bordi. | ||

|
Villaggio rurale | Questo villaggio rurale è controllato da te. E quindi puoi saccheggiare o richiedere risorse. |

|
Villaggio rurale | Questo villaggio contadino non è ancora sotto il tuo controllo. Per prelevare risorse devi conquistarlo. |
Quando si fa clic su uno di questi villaggi si apre un piccolo menu nella mappa che permette di scegliere varie opzioni.
| Bottone | Nome bottone | Funzione |
|---|---|---|

|
Panoramica della città | Se premi questo pulsante su una città in tuo possesso spunterà tale opzione. Premendola potrai visualizzare e quindi controllare la polis. |

|
Informazioni | Premendo questo pulsante potrete visualizzare le informazioni della polis e quindi: Il proprietario, il Nome della polis, L'alleanza ed le coordinate. |

|
Vai a | Premendo questo pulsante verrà centrata la mappa sulla polis selezionata. |

|
Attacco | Con questo pulsante aprirete la panoramica d'attacco sul player stesso. |

|
Supporti | Premendo tale pulsante potrete inviare dei supporti alla polis selezionata. |

|
Commercio | Premendo tale pulsante si aprirà una nuova finestra in cui e possibile scambiare risorse o commerciarle. |

|
Spionaggio | Premendo tale pulsate potrete inviare una spia nella polis nemica in modo da sapere quante unità ha e il livello degli edifici. Inoltre potrete sapere anche quante risorse ha in Magazzino. |

|
Incantesimi | Con questo pulsante potrete inviare poteri divini alla polis selezionata. Per fare ciò dovreste venerare un dio. |
| Villaggi rurali
Queste opzioni si applicano solo ai villaggi agricoli in vostro possesso. | ||

|
Richiedi | Premendo questo bottone potrete richiedere risorse |

|
Saccheggia | Premendo questo pulsante potrete saccheggiare risorse (facendo cioè il morale del villaggio calerà). |

|
Unità | Con questa opzione potrete richiedere truppe al villaggio rurale. (Questa opzione è attiva solo quando il villaggio rurale supera il livello 2) |
Non preoccuparti se non sai tutto di loro ora, imparerai più avanti.
Quando si fa clic su uno di questi pulsanti, si aprirà una finestra nella scheda Grepolis. Grepolis utilizza un sistema a finestre in modo da poter saltare tra diverse schede con facilità. Ad esempio, se si dovesse fare clic su Impostazioni, la cui icona si trova nella barra di menu, ciò si aprirà una finestra in un riquadro della scheda stessa del browser. Questa finestra può essere spostata, ridotta al minimo o una essere chiusa. Alcune finestre hanno anche le schede che portano a pagine diverse.

Esempio di finestra con linguette, il pulsate minimizza e un pulsante di uscita.
Se avete troppe finestre aperte contemporaneamente, è possibile cambiare questo. In "Impostazioni", si può scegliere un numero massimo di finestre da far apparire. La mia preferenza è solo 1 finestra per volta, in modo se apro un'altra finestra, automaticamente chiude la finestra precedente.
| Cosa fare adesso:
Col tempo ti abituerai all'interfaccia. Questa è una guida abbastanza dettagliata al riguardo. La sezione successiva della guida si occuperà delle risorse e dei modi per ottenerle. |
Missioni
Le missioni sono state introdotte nel 2013. Ci sono molte missioni e sono finalizzate ad aiutarti nel tuo percorso di dominazione! Troverai una guida dettagliata nella pagina delle missioni.
Risorse
"La gioventù e il momento migliore per essere ricco, e il momento migliore per essere povero." - Euripide
In Grepolis, ci sono tre principali risorse di base, che sono:
| Icona | Risorsa | Nome Risorsa |
|---|---|---|
| Legno | ||
| Pietra | ||
| Argento |
Queste tre risorse sono necessarie per creare unità ed edifici in Grepolis, quindi è fondamentale avere una buona scorta, così come conoscere i metodi perottenerli.

Le risorse sono tenute in un edificio chiamato Magazzino. Si può tenere una certa quantità di ogni risorsa nascosta nel magazzino, in modo che possa essere utilizzata quando si desidera. La quantità di spazio di magazzino a sinistra è segnato con il C circa la risorsa e la quantità massima di spazio di archiviazione disponibile si può vedere scorrendo su una risorsa. Il magazzino offre anche un nascondiglio di poco spazio nel caso in cui si ricevano attacchi, ma questo e spiegato dopo.
Le risorse possono essere ottenute in diversi di modi. Il primo è attraverso tre edifici che si possono costruire e/o ampliare, la Segheria , la Cava di pietra e la Miniera d'argento.
| Icona | Costruzione | Descrizione |
|---|---|---|

|
|
Segheria- Questo edificio produrrà legno da utilizzare. Più alto è il livello, più legno verrà prodotto ogni ora. |

|
|
Cava di pietra- Questo edificio produrrà pietra da utilizzare. Più alto è il livello, più pietra verrà prodotta ogni ora. |

|
|
Miniera d'argento- Questo edificio produrrà argento da utilizzare. Più alto è il livello, più argento verrà prodotto ogni ora. |
Ognuno di questi edifici produce le rispettive risorse su una base costante per la vostra polis, anche quando non siete connessi al gioco! Questi edifici possono essere ampliati, in modo da ottenere più risorse più velocemente. È possibile visualizzare la quantità di guadagno orario per ogni risorsa scorrendo sulla risorsa stessa nella parte superiore dello schermo. Quando si scorre sulla risorsa, si può anche scoprire se la vostra isola può avere un surplus di alberi o no, depositi di pietra di grandi dimensioni o no oppure miniere più profonde o no. Ogni isola ti fa ottenere un bonus del 10% sulla produzione di una particolare risorsa e una detrazione del 10% di un'altra. Questo vale per gli edifici di risorse oltre il livello 20.
Questo può sembrare stupendo in un primo momento, ma presto scoprirai che le risorse non sono mai sufficienti per fare tutte le attività che si desiderano in un determinato giorno. Per questo motivo, si riceveranno inoltre un bonus di risorse ogni giorno dopo il log in.
Tuttavia si potrebbe presto notare che anche con l'importo del bonus successivo di risorse non è ancora sufficiente per coprire le attività quotidiane! Pertanto, è possibile utilizzare un metodo chiamato "attaccare i villaggi rurali". Si noti che i villaggi rurali avvantaggiano i giocatori attivi, se non sei su Grepolis così tanto attivo, si consiglia di ampliare in modo costante gli edifici: Segheria, Cava Pietra, Miniera d'argento e Magazzino in modo da non restare senza risorse.
Farming
| Immagine | Villaggio | Descrizione |
|---|---|---|
|
|
Villaggio rurale (conquistato) | Con i villaggi rurali conquistati si possono richiedere risorse o saccheggiare risorse. (Dal livello 3 del villaggio si possono richiedere anche truppe) |
|
|
Villaggio rurale (non conquistato) | Prima di poter prelevare risorse è necessario conquistare il villaggio attaccando le difese. |
Nel villaggio rurale avete due opzioni. Potete richiedere risorse (che vi darà una minore quantità di risorse) o saccheggiarle (che vi darà il doppio di molte risorse, ma causerà anche una detrazione di umore). Per fare questo, si seleziona il villaggio rurale sulla vostra isola che si desidera utilizzare per prendere risorse e quindi fare clic su "Richiedi" o su "Saccheggia".
Ogni villaggio rurale ha uno stato d'animo che è specifico per ogni player. Questo significa che nessun altro giocatore può cambiare e quindi abbassare lo stato d'animo. Se lostato d'animo è troppo basso, il villaggio inizierà una rivolta se tentate di saccheggiarlo! Per riconquistare la fiducia del villaggio, sarà necessario inviare alcune unità per eliminare la resistenza. Lo stato d'animo può scendere fino all'84% senza timore che il villaggio si rivolti.
Ogni richiesta/saccheggio vi offrirà una certa quantità di risorse. Ad esempio, si potrebbero richiedere 10 risorse (si noti che la somma indicata è sempre la quantità di ogni risorsa, non la somma di tutte e 3 le risorse). Ogni offerta avrà anche un tempo stabilito in cui non sarà possibile prendere risorse da qual villaggio rurale.
Le offerte più efficienti sono sempre quelle da 5 minuti. I giocatori esperti spesso usano queste offerte per ottenere più risorse più velocemente, per costruire la loro polis in fretta. Si consiglia di effettuare la stessa cosa, mentre si è online, fino a quando si sta per disconnettersi, quando è necessario utilizzare l'offerta finale per ottenere la massima quantità di risorse prima di andare a dormire o andare al lavoro/ scuola, in quanto è più efficiente . Questo è il vantaggio per il sistema farming di Grepolis. Quando si è online, non è necessario utilizzare l'offerta più alta, cioè l'ultima. Basta cliccare ogni 5/20 minuti per ottenere le risorse.
| Top Suggerimento:
Conquista i villaggi rurali attorno a te! Come spiegato qui sopra i vantaggi che ne ricavi sono molti in campo di risorse ed questo ti aiuterà ad crescere maggiormente nel gioco. Se sei online usa la funziona di richiedere risorse ogni 5 minuti cosi in un'ora avrai riempito quassi tutto il tuo magazzino |
Espansione
Ogni villaggio rurale può essere ampliato per ottenere ancora più risorse! L'ampliamento richiede l'aiuto di tutti i player della tua isola, siccome il livello del villaggio è comune a tutti i player.
Conquista
All'inizio avrete a disposizione solo un villaggio rurale. Per ottenerne altri è necessario attaccare villaggi non conquistati e sconfiggere la resistenza che varia ogni volta che conquisti un villaggio ruruale.
| Per sapere di più: |
Popolazione
Avete notato che c'è un altro valore accanto alle risorse in alto. Questo si chiama popolazione e rappresenta il numero attuale di abitanti nella vostra attuale polis.
I tuoi villaggi (polis) hanno bisogno di essere ampliati ed avere risorse, per fare questo c'è bisogno di popolazione. Sarà necessario avere una Fattoria abbastanza grande per avere maggiore popolazione. Il numero in alto a destra, come il "95" indicato nell'immagine a destra, mostra la popolazione attuale nel tuo villaggio. Se non si ha popolazione secondo i requisiti richiesti non si potranno ampliare e/o costruire gli edifici e non si potranno creare unità.
Si noti, la maggior parte degli edifici e tutte le unità prendono un po' di cittadini, una buona idea sarebbe quella di ampliare la tua fattoria prima di ampliare un edificio o fare unità.
| Cosa fare adesso:
Continua ad utilizzare i tuoi villaggi rurali! Amplia la tua fattoria in modo da ottenere più popolazione ed amplia anche il magazzino in modo da contenere più risorse. |
Edifici
"E possibile garantire la sicurezza contro altri mali, ma per quanto riguarda la morte, noi uomini viviamo in una città senza mura." - Epicuro
Sapete già qualcosa sugli edifici, anche se questa guida vi aiuterà ad capire un po di più.
Clicca su "panoramica città", l'icona in alto a sinistra, o in alternativa, cliccare sulla propria città (quella circondata da un cerchio) e scegliere panoramica della città e si aprirà una finestra. Questa è la tua visione d'insieme della città, qui puoi vedere la tua città e gli edifici al suo interno. Da qui è possibile fare clic sugli edifici e assegnare azioni, ogni edificio fa qualcosa di diverso.
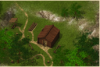
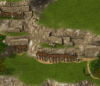
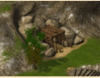
Al momento, la vostra città può apparire come segue:

In seguito può sembrare più simile a questa:

E alla fine può apparire così:

Utilizzando l'ultimo screenshot, vedremo ogni edificio e le sue caratteristiche:
| Numero | Icona | Nome edificio | Descrizione |
|---|---|---|---|
| 1 | 
|
Senato | Nel Senato puoi decidere di erigere nuovi edifici o di ampliare edifici già esistenti. Maggiore è il livello del senato, meno tempo ci vorrà per ultimare i lavori agli edifici. |
| 2 | 
|
Agorà | L'Agorà fornisce diverse statistiche per la tua città, non può essere ampliata, demolita o colpita da fulmini ed è una struttura permanente della tua polis. |
| 3 | 
|
Fattoria | La fattoria produce cibo per sfamare la popolazione. Più alto sarà il livello della fattoria, più cittadini saranno sfamati e più truppe si potranno arruolare. |
| 4 | 
|
Magazzino | Nella polis, le risorse sono conservate in un magazzino. Più alto è il livello del magazzino, più risorse sarà in grado di immagazzinare. Per ogni ampliamento 100 unità in più di ogni risorsa saranno protette durante i saccheggi. |
| 5 |
|
Segheria | Nei fitti boschi fuori dalla tua polis, i boscaioli della segheria si procurano grosse quantità di legname necessario alla costruzione della tua città e alle tue truppe. Maggiore è il livello della segheria, maggiore sarà il legname da costruzione prodotto dai tuoi boscaioli. |
| 6 |
|
Cava di pietra | Nella cava si estrae la pietra, necessaria per l'espansione di molti edifici. Più alto è il livello della cava, più pietra sarà prodotta. |
| 7 |
|
Miniera d'argento | Nella miniera d'argento i minatori raschiano il prezioso metallo che viene utilizzato per coniare le monete. Più alto è il livello di espansione della miniera, più monete d'argento potranno essere coniate.
Requisiti: Segheria livello 3 |
| 8 | 
|
Caserma | Nella caserma è possibile reclutare le truppe regolari e le unità mitiche. Più alto è il livello di espansione della caserma e più rapidamente si potranno allenare le unità.
Requisiti: Senato livello 2, Fattoria livello 3, Miniera d'argento livello 1 |
| 9 | 
|
Accademia | È possibile condurre una ricerca in ambito accademico. Questo edificio offre diverse tecnologie in grado di fortificare le truppe, rendere l'abilità di costruzione più efficace o dare nuove tecniche di battaglia. Più alto è il livello di espansione dell'Accademia, più tecnologie si possono ricercare.
Requisiti: Senato livello 8, Fattoria livello 6, Caserma livello 5 |
| 10 | 
|
Mura cittadine | Le mura cittadine proteggono la tua polis contro le truppe nemiche, rafforzano la difesa contro le truppe terrestri e aumentano il valore delle truppe terrestri in difesa.
Inoltre, cliccando sulle mura, puoi vedere tutte le truppe perse e sconfitte durante le battaglie. Requisiti: Senato livello 5, Tempio livello 3 |
| 11 | 
|
Caverna | Nella caverna è possibile assegnare le spie per fare spionaggio nelle città nemiche. Si può anche immagazzinare l'argento per pagare i loro servizi. Più alto è il livello della caverna, più argento vi si può immagazzinare. Quando la caverna è completamente sviluppata non c'è più limite all'argento immagazzinabile.
Requisiti: Senato livello 10, Magazzino livello 7 , Mercato livello 4 |
| 12 | 
|
Porto | Nel porto puoi ampliare la tua flotta. Puoi creare sia unità di trasporto sia unità da combattimento. La velocità di costruzione delle navi da parte dei lavoratori del tuo cantiere navale dipende dal livello di ampliamento del porto.
Requisiti: Senato livello 14, Segheria livello 15, Miniera d'argento livello 10 |
| 13 | 
|
Tempio | Nel tempio è possibile adorare un Dio a propria scelta. Ciascuno degli dèi di Grepolis può concedere diversi poteri divini e portare diverse unità forti ad aiutare la polis. Per entrambi è necessario il favore divino che viene generato con l'adorare il proprio Dio. Più alto è il livello del tempio, più favore divino sarà concesso dagli Dei.
Requisiti: Senato livello 3, Cava pietra livello 3 |
| 14 | 
|
Mercato | Al mercato è possibile inviare risorse ad altri giocatori, inoltre è possibile scambiarle con i villaggi dell'isola. Più alto è il livello del mercato, più risorse possono essere trasportate.
Requisiti: Senato livello 3, Magazzino livello 5 |
La strada per costruire gli edifici è attraverso il Senato. Al Senato, potete vedere l'albero di costruzione così come il livello dell'edificio ed i requisiti che servono per la costruzione e/o ampliamento. Per esempio, per ottenere l'opportunità di costruire la miniera d'argento, è necessario disporre della Segheria al livello 3. Con un po' di monete d'oro si può ridurre il costo/il tempo di costruzione.
L'ampliamento degli edifici vi darà più vantaggi e la possibilità di costruire unità più grandi e migliori. Per esempio, l'ampliamento dell'accademia ti da l'opportunità di ricercare nuove ricerche diverse.
Per ampliare un edificio è necessario disporre dei i requisiti per la costruzione, come spiegato nella tabella, così come popolazione e risorse sufficienti. Poi tutto quello che dovete fare è cliccare su Ampliamento!
Si noti che la costruzione prende un po' di tempo. Perciò si può inserire un altro edificio nella coda, in modo che possa essere costruito direttamente dopo l'altro.
| Per sapere di più:
Da questa pagina potrete sapere molto di più sulle funzioni e vantaggi di ogni singolo edificio.. |
| Cosa fare adesso:
Non cessare di richiedere risorse dai villaggi rurali! Amplia la fattoria per avere maggiore popolazione per ampliare gli edifici e costruire unità. Cerca di costruire i tuoi edifici in risposta a quello che ti serve, ad esempio se hai bisogno di più unità di pietra, amplia la cava di pietra il più possibile. Tuttavia, se si ampliano gli edifici nel giusto ordine si dovrebbe raggiungere questo in pochissimo tempo. Buona corporatura: Senato: Livello 3; Fattoria: Livello 3; Magazzino: Livello 2; Segheria: Level 3; Miniera d'argento: Livello 1; Cava di pietra: Livello 3; Caserma: Livello 1; Tempio: Livello 1; |
Unità
"Gli uomini coraggiosi sono la più forte torre di difesa in una città" - Alceo
Con il passare dei giorni, si avvicina la fine della protezione principianti (la protezione che hai guadagnato in automatico all'inizio del gioco). Adesso è vitale costruire un buon esercito per proteggerti dagli altri player, anzi, per riuscire a dominarli nelle loro polis!
| Top Suggerimento:
Un player può avere 500 o 3000 punti, ma senza esercito sotto il suo commando, finirà con l'essere dominato in battaglia. Quindi assicurati sempre di avere una buona scorta di unità militari. Quindi non farti intimorire dai punti di un player. Solo perché il nemico possiede tanti punti, non significa che possiede anche un grande esercito. |
In Grepolis ci sono diverse unità, ognuna con i propri vantaggi e svantaggi. Diverse unità sono potenti in attacco mentre altre lo sono in difesa. Assicurati di scegliere sempre l'unità giusta per le tue intenzioni, osservando le statistiche di ogni unità! Qui sotto è presentata una tabella con le statistiche di ogni unità. Non preoccuparti se non riesci a comprendere a pieno la tabella, di questo discuteremo più tardi. Le truppe sono addestrate nella Caserma (eccezion fatta per la Milizia), anche se la maggior parte di loro ha bisogno di essere prima ricercata in accademia, ma di questo parleremo dopo.
| Icona | Nome unità | Descrizione | Valori | |
|---|---|---|---|---|
| Milizia | La milizia è un'unità speciale che non può essere addestrata nella caserma. Infatti la milizia consiste in cittadini arruolati dalla Fattoria. Arruolando la milizia attraverso la fattoria, si accetta tempraneamente di avere la metà della produzione di risorse in cambio di qualche unità di milizia (10 per ogni livello di fattoria, 15 con la ricerca "Guardia Cittadina"). Tutto ciò durerà 3 ore.
Non puoi usare la milizia come una normale unità. Non puoi attaccare o controllare la milizia. Tuttavia la milizia difenderà la tua polis per 3 ore. Dopo queste 3 ore la tua milizia ritornerà a lavorare in fattoria. Ricordati che la milizia non ti costa nessuna unità di popolazione. |
0 |
N/A | |
| 0 |
6 | |||
| 0 |
8 | |||
| 0 |
4 | |||
| Spadaccino | Gli spadaccini sono una lenta unità difensiva coperta da una pesante armatura. Sono le prime unità a poter essere addestrate e sono molto efficienti contro gli attacchi a distanza. Tuttavia sono deboli in attacco siccome sono lenti e poco potenti. | 95 |
5 | |
| 0 |
14 | |||
| 85 |
8 | |||
| 1 |
30 | |||
| Fromboliere | I frombolieri sono un'ottima ed economica unità offensiva. In grande numero possono avere una grande potenza d'attacco. Possiedono anche una buona velocità. Tuttavia sono molto deboli in difesa. | 55 |
23 | |
| 100 |
7 | |||
| 40 |
8 | |||
| 1 |
2 | |||
| Arciere | Gli arcieri hanno una buona velocità e una buona capacità di trasportare risorse dalle polis saccheggiate. Tuttavia sono deboli in attacco, sono infatti un'unità difensiva. Difendono abbastanza bene contro gli Opliti. | 120 |
8 | |
| 0 |
6 | |||
| 75 |
25 | |||
| 1 |
12 | |||
| Oplita | Gli opliti sono una lenta unità con buone statistiche. Possiedono un buon attacco e una decente difesa. Sono una versione lenta dei Carri da guerra, anche se gli opliti sono meno costosi e usano meno popolazione. | 0 |
16 | |
| 75 |
18 | |||
| 150 |
12 | |||
| 1 |
7 | |||
| Cavaliere | I cavalieri sono una potente unità offensiva con una grande velocità e la capacità di trasportare molte risorse saccheggiate da altri giocatori. Tuttavia sono costosi e deboli in difesa, soprattutto contro le armi bianche. Hanno anche bisogno di requisiti, anche se ne vale la pena per un'unità come il cavaliere. | 240 |
55 | |
| 120 |
18 | |||
| 360 |
1 | |||
| 3 |
24 | |||
| Carro da Guerra | I carri da guerra sono un'unità mista veloce. Possiedono un buon attacco (non così buono comparati per popolazione con gli Opliti) e una buona difesa (però contro le armi bianche sono deboli). | 200 |
56 | |
| 440 |
76 | |||
| 320 |
15 | |||
| 4 |
56 | |||
| Catapulta | Catapulta | Le catapulte possiedono una caratteristica speciale. Se portate in battaglia, riducono il livello delle mura nemiche. Oltre a questo, sono anche una normale unità d'attacco, siccome infliggono danni all'esercito nemico. Tuttavia, sono molto lente. | 1200 |
100 |
| 1200 |
30 | |||
| 1200 |
30 | |||
| 15 |
30 | |||
Non preoccuparti se non hai ancora capito ogni singolo valore della tabella, saranno tutti spiegati a breve. Ricordati che la caserma è obbligatoria per costruire un esercito.

| Top Suggerimento:
Nella caserma puoi notare un + vicino alle unità che puoi addestrare. Cliccandolo, potrai vedere tutte le unità addestrabili in quella città, anche quelle che hanno ancora bisogno di requisiti. |
Per addestrare unità, devi scegliere l'unità desiderata, digitare il numero di unità desiderato e cliccare sulla. L'unità in addestramento appare nella parte inferiore della finestra fino alla conclusione dell'addestramento.
Tutte queste truppe sono buone, ma per conquistare i mari e attaccare i player delle altre isole hai bisogno di una flotta. Ogni nave costruita nel Porto ha i suoi vantaggi; alcune navi trasportano unità terrestri mentre altre combattono contro le navi nemiche. Ricordati di scegliere la nave giusta in base alle tue esigenze.
| Icon | Unit Name | Description | Values | |
|---|---|---|---|---|
| Nave da trasporto | Le navi da trasporto sono il mezzo per portare le tue truppe da un'isola all'altra. Rimangono alla fine della flotta, prottete dalle altre navi. | 500 |
7 | |
| 500 |
20 | |||
| 400 |
1 | |||
| Bireme | Le biremi sono un'unità estremamente forte in difesa. Sono le migliori per proteggere il tuo porto. | 800 |
8 | |
| 700 |
24 | |||
| 180 |
160 | |||
| Nave incendiaria | Nave incendiaria | Le navi incendiarie sono un'unità estremamente forte in attacco. Possono essere mandate in attacco per distruggere le navi nemiche. | 1300 |
10 |
| 300 |
200 | |||
| 800 |
60 | |||
| Brulotto | I brulotti sono navi particolari che possono essere usate solo dal difensore. Sono la tua ultima linea di difesa. Se attaccati, ogni brulotto distrugge una nave nemica, distruggendosi anch'esso. | 500 |
8 | |
| 750 |
20 | |||
| 150 |
1 | |||
| Nave da trasporto veloce | Le navi da trasporto veloce possono portare unità verso altre isole (come le navi da trasporto), ma sono più veloci e trasportano meno unità. | 800 |
5 | |
| 0 |
20 | |||
| 400 |
1 | |||
| Trireme | Le triremi sono una costosa nave che può essere usata sia in difesa, sia in attacco. | 2000 |
16 | |
| 1300 |
180 | |||
| 900 |
250 | |||
| Nave coloniale | La nave coloniale è una parte integrale di ogni impero. Queste preziose navi coloniali sono necessarie per conquistare una polis o fondarne una. | 10000 |
170 | |
| 10000 |
0 | |||
| 10000 |
500 | |||
Queste unità navali sono costruite nel porto in maniera simile all'addestramento nella caserma.

C'è anche un terzo tipo di unità, ma lo vedremmo più tardi.
| Per sapere di più:
Questo portale vi porta a tutte le pagine delle unità, per conoscerle meglio. |
Strategia (Difesa e Attacco)
Adesso che sai il funzionamento delle unità principali, è un buon momento per discutere di strategia. I player esperti scelgono una strategia per ogni polis. Alcune strategie sono avanzate o strane, anche se per la loro prima polis scelgono principalmente tra 2 strategie, offensiva o difensiva.
Perché scegliere una strategia? Principalmente perché è difficile avere un'efficiente polis ibrida (offensiva e difensiva) in Grepolis. Si può avere una polis ibrida senza problemi, anche se strategicamente, non sarebbe in grado di buttare grossi eserciti in difesa o in attacco e quindi di portarti lontano. Specializzare quindi la tua polis in attacco o in difesa significa massima efficienza contro eserciti del tipo opposto.
Quindi si scelgono le 2 strategie. Prima la strategia d'attacco. Se vuoi costruire una polis offensiva, devi concentrarti nell'addestramento di unità offensive, come Frombolieri e Cavalieri, astenendoti dall'addestramento di unità difensive come gli arcieri. La flotta dev'essere composta da navi da trasporto (per trasportare le truppe) e navi incendiarie per il miglior attacco.
Invece, per la strategia di difesa, dovresti addestrare unità difensive come arcieri, spadaccini e carri da guerra, astenendoti da frombolieri e cavalieri.La flotta dev'essere composta da navi da trasporto (per difendere altre città con le tue truppe) e biremi per la migliore difesa.
Puoi anche costruire gli edifici in modo differente. Per esempio, costruendo le mura ad un livello superiore al 20 per ricevere la massima efficacia in difesa, o ampliando la caserma per addestrare più velocemente. Imparerai a fare la tua scelta!
Valori per ogni unità
Avrai visto nelle tabelle di prima diversi tipi di valori. La seguente tabella li spiega in modo dettagliato.
| Icona | Nome | Descrizione |
|---|---|---|
| Attacco contundente | Questo valore rappresenta il tipo di attacco di un'unità. Maggiore è il valore, maggiore è la potenza dell'attacco stesso. | |
| Attacco arma bianca | Questo valore rappresenta il tipo di attacco di un'unità. Maggiore è il valore, maggiore è la potenza dell'attacco stesso. | |
| Attacco a distanza | Questo valore rappresenta il tipo di attacco di un'unità. Maggiore è il valore, maggiore è la potenza dell'attacco stesso. | |
| Difesa contro un'arma contundente | Questo valore rappresenta la difesa di un'unità rispetto all'attacco contundente. Maggiore è il valore, maggiore è la potenza della difesa stessa. | |
| Difesa contro un'arma bianca | Questo valore rappresenta la difesa di un'unità rispetto all'attacco di arma bianca. Maggiore è il valore, maggiore è la potenza della difesa stessa. | |
| Difesa contro un'arma a distanza | Questo valore rappresenta la difesa di un'unità rispetto all'attacco a distanza. Maggiore è il valore, maggiore è la potenza della difesa stessa. | |
| Capacità bottino | Questo valore rappresenta il totale delle risorse che l'unità presa in considerazione riesce a saccheggiare. Il valore non è mostrato nelle precedenti tabelle. | |
| Velocità | Questo valore rappresenta la velocità dell'unità presa in considerazione. Maggiore è il valore, maggiore è la velocità dell'unità stessa. Il valore non è mostrato nelle precedenti tabelle. | |
| Unità Navali
I seguenti valori sono applicati solo per le unità navali. | ||
| Attacco | Questo valore rappresenta l'attacco di un'unità navale. Maggiore è il valore, maggiore è la potenza dell'attacco stesso. | |
| Difesa | Questo valore rappresenta la difesa di un'unità navale. Maggiore è il valore, maggiore è la potenza della difesa stessa. | |
| Capacità di trasporto | Questo valore rappresenta il numero di unità terrestri che una nave può trasportare. Il valore non è mostrato nelle precedenti tabelle. | |
Avrai notato che per le unità terresti ci sono diversi tipi di attacco. Ogni unità possiede una delle tre armi per attaccare(contundente, arma bianca o a distanza). Ogni unità possiede anche tre tipi di difesa, in cui ognuna mostra la difesa per contrastare l'arma dell'attaccante. Quindi, se un fromboliere (che possiede un'arma a distanza) attacca uno spadaccino, quest'ultimo userà la difesa contro le armi a distanza.
| Cosa fare più avanti:
Cerca di saccheggiare altre polis (o villaggi rurali) quando puoi. Usando la tua caserma, cerca di addestrare abbastanza frombolieri (non importa il tipo di strategia usato in questo caso, dato che gli frombolieri ti saranno utili nella prima polis) per conquistare altri villaggi rurali. Questo aumenterà i tuoi profitti! Ritornando agli edifici, ti serve un'accademia da costruire, anche se nel percorso avrai già costruito il tempio e il mercato. Ricordati che:
|
Ricerche
"La saggezza supera ogni ricchezza." - Sofocle
Hai sicuramente notato che, nonostante il grande numero di unità di cui si è discusso, puoi addestrarne poche per il momento? Come addestrare le altre unità? La risposta è ricercandoli nell'Accademia.

Ci sono diversi tipi di ricerche. Alcune servono per addestrare diverse unità (per alcune unità sono presenti altri requisiti oltre alla ricerca in accademia), alcune vi daranno piccoli bonus (come Diplomazia, che diminuisce il pericolo di rivolta da parte di un villaggio rurale) e le altre vi daranno accesso a diverse abilità.
Ci sono 32 ricerche comuni a tutti i mondi, quindi elencarle tutti sarebbe ingombrante! Quindi, per spiegare lo stesso ognuna delle ricerche, la tabella sotto è ordinata come nella panoramica dell'accademia. Clicca sopra ogni ricerca per saperne di più.
| 1 · · | 4 · · | 7 · · | 10 · · | 13 · · | 16 · · | 19 · · | 22 · · | 25 · · | 28 · · | 31 · · | 34 · · |
Ogni ricerca necessita narmali risorse ed un livello minimo dell'accademia (per esempio gli opliti possono essere ricercati solo se l'accademia ha già raggiunto il livello 4). Ogni ricerca necessita inoltre di una risorsa aggiuntiva, chiamata Punti Ricerca.
Per ricercare tecnologie/ricerche, una volta raggiunti i requisiti, devi cliccare nella freccia in basso a destra all'icona che rappresenta la ricerca che desideri. Mentre la tecnologia viene ricercata, appare nella parte bassa della finestra, e sarà attiva solo una volta finito il tempo di ricerca.
Punti Ricerca

I punti ricerca sono una risorsa che si guadagna e si utilizza in accademia. Ogni livello aggiuntivo dell'accademia vi darà 4 punti ricerca aggiuntivi da usare su una ricerca a vostra scelta. Avendo l'accademia 30 livelli, avrai un massimo di 120 punti ricerca. Dato che 120 punti ricerca non bastano per tutte le ricerche, scegli quelle che preferisci. Attenzione, una volta ricercato qualcosa, sbarazzarsene avrà i suoi costi quindi fatte attenzione a come spendete questi punti.
| Cosa fare più avanti:
Il saccheggio è ancora utile per il momento! Guarda qualcuna delle prime ricerche che ti potrebbero servire, come Fromboliere o Arciere. Poi, una volta ricercato uno di questi due, addestratene qualcuno per conquistare villaggi rurali. Ricordati, per il quarto villaggio rurale dovrai sconfiggere 60 frombolieri e dovrai possedere un minimo di 40 unità nella polise. Ricordati inoltre che, anche se ti trovi in un mondo con una lunga protezione principianti, essa sta per scadere, quindi ti servono molte truppe per difenderti. Per quanto riguarda gli edifici, cercate di ampliare gli edifici di produzione di risorse sopra il livello 15, per avere più risorse. Dovete anche ampliare il Senatoal livello 14, per costruire un Porto. Ampliate l'accademia quando potete, perché sarà di vitale importanza successivamente. |
Altri giocatori
Avrai notato che nella tua isola ci saranno altri player che continuano a crescere, proprio come te! In Grepolis puoi comunicare con loro, collaborarci o combatterci contro. Alcuni giocatori saranno amichevoli e vorrano collaborare con voi, altri vi saranno ostili e vorrano combattere con voi. La cosa migliore è bilanciare amici e nemici.
Alleanze
In Grepolis, gruppi di player possono formare Alleanze. Questi giocatori collaborano per sconfiggere nemici e proteggersi a vicenda, communicando tra di loro. Una buona alleanza sarà efficiente (ognuno communicherà con gli altri e aiuterà gli altri) mentre un'alleanza non abbastanza buona sarà disorganizzata (ognuno penserà solo per se, finendo per scogliersi come alleanza).
Intanto che cresci, puoi ricevere inviti da diverse alleanze. Alcune di queste possono sembrare buone, altre non abbastanza. Controlla prima i loro punti, la loro posizione in classifica e altri dettagli. Anche se ciò può essere un aiuto, una buona alleanza non dipende dai punti o dalla pasizione in classifica, ma dai player!
| Top Suggerimento:
Controlla sempre la gestione e i dettagli di un'alleanza. Ricordati alcune regole:
|
Quindi, le chiavi per una buona alleanza sono:
- Molta attività nel forum alleanza.
- Leader e player corretti e gentili
- Un buon bilanciamento di diplomazia (troppa diplomazi non va bene, ma un minimo può salvarti dall'attacco; tienine conto siccome spesso i leader si alleano con troppe alleanze).
- Reclutamento adatto e responsabile.
Ci sono sicuramente più punti da tenere in considerazione, ma questi sono i principali.
Puoi anche creare la tua stessa alleanza, ma questo è consigliabile solo dopo un po' di esperienza.
Una volta che sei in un'alleanza, noterai che alcune polis cambieranno colore! Questo è perché la tua alleanza ha relazioni diplomatiche con altre alleanze. Stai attento alle polis con il colore rosso, perché sono polis nemiche!
Scambi commerciali
In Grepolis puoi scambiare risorse con altri giocator (attraverso il Mercato), con villaggi rurali (direttamente dalla panoramica dei Villaggi rurali) e con il Commerciante Fenicio! Tuttavia, devi essere sicuro che sia un buon affare, se no rischi di avere una carenza di risorse!
Lo scambio commerciale è fondamentale nell'avanzamento del gioco, anche scambiando le risorse meno utili tra le tue stesse polis.
Scambi commerciali con altri giocatori
To trade with other players, you must have a marketplace level 5, or level 10 to trade with players on other islands. In the marketplace, you can create offers to trade a certain amount of one resource for a certain amount of another, or alternatively, accept another players offer. You don't have to do a complete offer either, you can do a part exchange of resources too. Note that this isn't instant and it will take time for the resources to be transported to your village.
However, bear this is mind:
- The lower the ratio, the better the deal for you!

If you see an offer you like, it is as easy as clicking the tick! Alternatively, press the down arrow when you scroll over the offer to do a part offer.
Scambi commerciali con villaggi rurali
You can also trade with farming villages. Every farming village can trade a certain resource for another resource at a starting ratio of 1:1.25, although this will decrease as you trade more with the farming village. However, it does replenish over time.
For trading with farming villages, bear this in mind:
- The higher the ratio, the better the deal is for you!

To get this overview, click on the farming village you wish to trade with and then press the trade button. You may only trade with the farming village if its mood is over 80%.
Scambi commerciali con Velerios (Il Commerciante Fenicio)
The last method of trading is through Velerios, the Phoenician Trader. In order for him to visit your village, you need to have a harbor.
Every 24 hours, the Phoenician Trader will visit one of your villages and offer different trades (which vary daily). By clicking on his ship when it arrives, you may see what trades he has to offer. Each day, he'll have the option to trade one resource for another, or silver for a set amount of troops.

To take an offer, move the slider to where you want and then click the tick. After you have finished or after 8 hours, he will be whisked away, returning in another 24 hours.
| Read More: |
Espionage
Using the Cave, you may use silver to spy on other players villages and troops, as well as defend yourself from espionage.

In the cave, you can store up silver in defence or preparation for an espionage attack. Each cave level will let you store 1000 more silver, with a level 10 cave allowing you to store an infinite amount of silver. Remember that whatever you put into the cave cannot be put back into your current resource supply in the warehouse.
Sending a spy is simple. All you need to do is find the village you wish to spy on and click the espionage button (denoted by a hooded figure). Then you must choose the amount of silver you will pay the spy (1000 is the minimum) and send him on his way to the enemy village.
There is a single factor which determines whether a spy is successful or not. The amount in the enemy players cave. If the amount in the enemy cave is higher than what was sent with the spy, you won't get a spy report as well as the enemy player getting a spy report saying that you have spied on his/her village. The amount you sent with your spy will also get subtracted with that players spy.
If your spy was successful, you will get a report identifying what level buildings, what troops and other information about the enemy players village.
| Osl112's Top Tip:
Don't take a spy report for complete granted. It only gives a spy report of what was in the village at that moment, not what belongs to the village. Some troops may be out attacking or supporting another village, so bear this in mind. |
There are technologies that can change the result of an espionage, Cryptography and Espionage (Tech). It is a good idea to research these as they can be the difference between getting and not getting a battle report.
The Battle System
Battling is a key part of Grepolis and at times, it can be so unpredictable due to the number of factors involved! A single battle can win or lose a conflict with another player, or even win or lose a war! Working with others in your alliance is key in Grepolis, as it could be support from them that saves you from an entourage of attacks.
Multiple factors effect the outcome of a battle, whether you are attacking or defending. These include:
- Small Premium Advantages (explained in section 10.1)
- Technologies (such as Phalanx)
- Buildings such as the Wall, which help the defending player
- Whether a Divine Power (explained in section 9) has been enacted on the attack
- What units are involved (the most obvious one)
- Luck, a randomly generated variable which sways 30% in your, or the other players favour
- Morale (explained in section 2)
and more.
| Osl112's Top Tip:
Spying on a village to see what they have in terms of some of these factors is always a good idea, though make sure it is good as an unsuccessful spy could leave your plans to attack exposed. |
There are also different types of attack as well as the ability to support. Attacks, such as breakthrough make transport ships more likely to reach the village whilst sacrificing some naval ships attack. The ability to support allows you to transport troops ahead of an attack to defend an allies village. Note though that you cannot move your troops around whilst in that village.
The Agora is the rally point in your city. In the Agora, you can see what troops are outside your village, which troops are supporting other villages (you can withdraw troops through the simulator too) as well as a simulator which estimates losses against certain units.
| Osl112's Top Tip:
The simulator is a superb tool for predicting the outcome of a battle and be sure to use it often. However, don't expect to get that outcome in the actual battle, as other factors which can't be predicted will come into play, such as luck. It will be similar, but not exactly the same. |
Attacking is easy. Simply click on the attack tab/button after selecting the village you wish to attack. Then, choose which units you wish to attack with, select an attack type at the bottom (if you have researched others) and click send. The units may take some time to get there, in which the player may choose to call for support from allies. You can support in a similar way to attack, but with clicking support instead of attack.
Essere attaccati?
If you are being attacked, do not fear. There are a number of things you can do to stop the enemy.
- Communicate with your alliance and try to get support. You can also call upon your alliance to launch a counter attack.
- Build up your wall level so that the defence of your village is greatly improved.
- Use divine powers (explained in section 9) to weaken the attack.
- Activate Milizia
- Build up defensive troops in an attempt to defend
However, the main thing to remember is not to panic. It isn't the end of the world and with farming, you can rebuild quickly and swiftly. If you are being attacked repetitively, use this guide.
If you think you are being conquered (someone is taking your city), please read "Being Conquered" in section 11.
| What to do now:
Continue farming. Keep building a good amount of troops to attack players with or defend against. If beginners protection has ended, you may now attack players to get more resources but be careful who you attack; use your simulator and look up the alliance to see if they might fight back with severe force. As for buildings, keep going. Expand your mines a little more (level 20-22 or higher if you don't farm a lot), expand your Warehouse to a good level (level 8-12) and expand all other buildings. Now is the time to get the final two main buildings, so build up the requirements for the Temple and Marketplace and build them. If building the requirements for these buildings get a little slow, build up your Senate too. By now, you should be looking at one objective to get another village! For this, you will need a warehouse of level 20 (with the technology Ceramics), an academy of 28 and a harbor of level 20. Keep this in mind that these three buildings are key. |
The Gods
"As god disposes man laughs or weeps". - Sophocles
In Grepolis, you can worship Greek Gods to gain access to their powers and special units that you may only build whilst in their worship. You also have a new resource, called divine favor.
Divine favor is obtained depending on the level of the temple. The higher the level of the temple, the more divine favour you may earn per hour. However, no matter what level the temple is, the maximum amount of divine favor you can collect from all cities is 500. Divine favor is used in every spell as well as all mythical units.
There are 5 gods to choose from and they are as follows:

God of the Sky |
God of the Sea |

God of Wisdom |

God of Family |
God of the Underworld |
You may choose which god you worship through the temple.
Each god has 4 unique spells, called Divine Powers which can be used in different situations. Each spell effects a different thing; some instantly give you a set amount of resources, some give you an extra amount of resources over a period of set time and others can strengthen or weaken attacks!
| Osl112's Top Tip:
Be sure to research each God carefully (you can click the gods in the table above), as some may have divine powers or units that will benefit you more than others. There is no right or wrong answer to which god you choose in your first village. |
Each god also has 2 mythical units, which are built using divine favour and regular resources. These resources are far superior to normal units. Some can even fly between islands, meaning transport ships aren't needed to move them between islands!
Mythical Units
Mythical units have three requirements: enough divine favour, enough resources and a specific temple level. If those three are in place, you may build one of these "divine units" through the barracks (with the exception of the Hydra, which is a naval unit and can be built in the harbour). Below are the tables outlining the mythical units.
Zeus
| Zeus' Mythical Units | ||
|---|---|---|

|
Minotaurs are huge creatures, half human, half bull. They strike with powerful blows using an axe. Their toughness makes them a difficult enemy to overcome. | 1400 |
| 600 | ||
| 3100 | ||
| 202 | ||

|
Manticores have a head of a lion, the wings of a dragon and the tail of a scorpion. They plunge from the sky, grab their prey with their claws and sting them with their infamous poisonous stinger. Manticores can fly to other islands without transport ships. | 4400 |
| 3000 | ||
| 3400 | ||
| 405 | ||
Poseidon
| Poseidon's Mythical Units | ||
|---|---|---|

|
Cyclops are one-eyed giants who throw large boulders at their foes. They can be defended against with sharp weapons. | 2000 |
| 4200 | ||
| 3360 | ||
| 360 | ||

|
There is no wave, no storm, no enemy than a seafarer fears more than a hydra. The nine-headed monster rises from the water, crushes entire ships with its mouths and devours its crew. | 5400 |
| 2800 | ||
| 3800 | ||
| 400 | ||
Athena
| Athena's Mythical Units | ||
|---|---|---|

|
A centaur is a proud warrior with the body of a horse. It quickly gallops past enemies, shoots precise arrows and swiftly disappears. Centaurs are great defending against sharp weaponry. | 1740 |
| 300 | ||
| 700 | ||
| 100 | ||

|
A pegasus is a winged horse that plunges at its enemies from the high sky. Its joyful appearance fools enemies, luring them into a false sense of security. Pegasi can fly to other islands without transport ships. | 2800 |
| 360 | ||
| 80 | ||
| 180 | ||
Era
| Hera's Mythical Units | ||
|---|---|---|

|
Many farmers report that certain creatures plunge from the sky on the occasional stormy day. They are half woman, half bird; grasping their prey from the sky at lightning speed before disappearing just as fast. Harpies do not require transport ships to travel from one island to the next. | 1600 |
| 400 | ||
| 1360 | ||
| 130 | ||

|
No matter how brave, every warrior that stares directly into the eyes of Medusa will feel his arms and legs go rigid. This snake headed creature will then smash the statue of the petrified warrior. | 1500 |
| 3800 | ||
| 2200 | ||
| 210 | ||
Hades
| Hades' Mythical Units | ||
|---|---|---|

|
Armed with sharp teeth, this three headed dog guards the gate to the underworld. If anyone dares to sneak past him, Cerberus will bury his teeth deep into the trespassers skin, leaving him in agony. No one has got passed him alive. | 1125 |
| 1350 | ||
| 2700 | ||
| 230 | ||

|
Erinyes are the dreadful daughters of Hades and Persephone. Goddesses of vengeance, they fight mercilessly to avenge the dead. Poisonous blood drips from their eyes, horrifying screams drive opponents to insanity. These beasts are a feared foe. | 2250 |
| 4500 | ||
| 4500 | ||
| 480 | ||
Please note: the above tables do not include attack, defence, speed or loot values.
Changing God
If you don't like the current God you have for your village, you may change it through the temple. However, this will wipe out all the favour you have, as well as instantly getting rid of all the mythical units in your village. As well as this, you cannot support a village that is worshipping another God with your Gods units; you may only support the same God with the same God's units.
| What to do now:
Continue farming... it may seem repetitive but it does give you a great supply of resources. You may also consider Booty, which will double the resources as well as doubling the time for replenishment. Buildings. Keep pumping up everything; the Farm for more population, the Academy to try and get to your aim as well as your Harbor and Warehouse. You may also wish to expand other buildings a little for the benefits they may offer, such as the Temple for these mythical units. The mines shouldn't be expanded much more at this point. You should almost be building troops of your preference up almost constantly. Try to have over 500 (or more) in total. They should be different types, too. You should also build up some Transport Ships and other ships of your choice as well. Also, research if you wish. Remember the aim: another village. To get another village, you require the researches Colony Ship and Conquest, which are available at level 22 and 28 in the academy. |
Furthering the Game
"Success is dependent on effort." - Sophocles
There are many ways you can further the game, to make it fun for you and to get more involved with Grepolis' thriving community. You'll be meeting like-minded players, experienced players and new friends. You may also further the game with the use of premium, to grant you access to new overviews and little bonuses.
Gold & Premium
In the Premium menu, you have the opportunity to use gold for small in game advantages. These advantages could be a new overview, or even a bonus to your resource production.
There are 5 advisers you can acquire the help of, each helping out a different way. Every adviser grants you different bonuses so be sure to check out the features of all of them. All of the advisers cost 100 gold and last for 14 days on the world you are playing. They are activated through the premium menu (be sure to click if you want them to automatically extend or not).
Administrator
The administrator offers you new overviews that you can use to easily manage your city. This includes a quickbar, which gives you key links (which you can personalise) to key pages on the main overview.
He also grants you access to the notepad, in which you can write notes as well as links to other players/alliances if ever you need to remember something.
Merchant
The merchant grants you to 30% extra resource production through your resource buildings. It is handy whether you are on Grepolis a lot or a little.
High Priestess
The high priestess has a good relationship with the gods. She works with them and your temple, offering you 50% more favour production. As well as this, she helps mythical units train, giving them a 20% strength bonus.
Commander
This experienced commander will motivate your troops and lead them into more tactical strategies. His high regard among the other troops gives them a 20% bonus in battle, meaning that they fight stronger.
Captain
The captain is experienced amongst seafarers and knows how to get through a stormy day on the seas. He has battled in many fights and knows how to win. His valuable enhancement gives your ships more tactical ability and for that reason, they fight 20% stronger.
The captain also has a great ability to plan. By getting him, you may plan through the attack planner; a superb method of organising attacks. You may share this with allies too, so that you can work together more efficiently.
Other Bonuses
There are many types of bonuses, most of which speed certain aspects of the game up.
- Building/Research Times can be cut by half (20 gold for each research/building)
- Summoning of the Phoenician Trader instantly (50 gold)
- Olympics can be ran through the Agora (you'll find out more about this later, 50 gold)
Getting Gold
There are a number of ways to get gold. The first of which is by buying it! It isn't too expensive and can be made to last as long as you wish. There are a number of ways of buying it too; for example by credit card, Paypal, SMS and even Ukash!
The other ways are for free, yet require you to do certain activities. You can use SponsorPay (select SponsorPay on the menus), in which by partaking in anything, such as a free survey, to buying a sponsors item, to trialling something you can gain free gold! It really is as simple as that.
The last way is by referring your friends! For each friend that gets over 1000 points which you enlist, you get 200 gold! It is as simple as that! You could also link your friend to this guide so that he can get guidance to 1000 points and beyond, if you wish ;). To get to your referral links, click "Earn Free Gold" at the bottom of the premium menu.
Forum
Another way of enhancing the game for you is by joining the forums. The forums are a superb way to chill out with similar Grepolis players. There, you may share your views, debate on a number of topics or even play a game or two, the list is endless.
It is also a vital way of getting news on your world. For every world, there is a world forum where you may discuss a number of in game topics or even find out about the latest wars declared. You never know what may be happening in your world until you check out the forums!
| Osl112's Top Tip:
Be sure to follow the forum rules. The forums are full of friendly characters though if you ever come under a spot of bother, report the post or talk with a mod; because we are friendly people too! |
So sign up today and check out your world today. Get views from the experienced while spreading your own. It is the best way of being heard. And if you are wondering where to start, why not comment on what you think of this guide or show your appreciation?
| Read More: |
Terms
You may come across some terminology on the forums that you may not be so familiar with. Here is a list of the common terms, with another link to more abbreviations you may come across.
def - defense/defensive (eg. an archer is a def unit).
off - offense/offensive (eg. cavalry is an off unit).
def city - A city with only defensive units.
off city - A city with only offensive units.
farm vill - A farming village
res - Resources.
prem - Premium
BP - Beginners protection, the first few days after joining a world when you cannot be attacked.
BP - BP can also mean battle points which are gained from killing enemy units.
BPA - Battle points attack, BP gained from attacking.
BPD - Battle points defense, BP gained from defending.
Grepo - Grepolis. Also abbreviated to GP.
Wiki - The Wiki (where you are now)!
Inno - An abbreviation of InnoGames, the company which makes Grepolis.
| Read More: |
| What to do now:
You are very close to becoming a superb Grepolis player, yet one of the hardest tasks lies ahead. This is Colonising and Conquering. Oh, and keep farming It is time to prepare your village ready for battle. By now, you should have lots of troops; and don't stop now. Keep building your Farm level up so that you can handle the population increases. By conquering, your farm should be in the mid-late 20/early 30 levels. You shouldn't need to upgrade your resource buildings, but if you must, do it by a level. However, by now you should know what you want to build, though mainly concentrate on getting your Warehouse to level 20, Harbor to level 20 and Academy to level 28. You are close, keep working towards those Colony Ship and Conquest researches; patience is key as they take a while to save up for and get to! |
Conquering/Colonising
"The art of living well and the art of dying well are one." - Epicurus
By now, your village should be built up quite well and fully functioning. You should have many troops at your hands and many buildings which all serve different purposes. You may have fought many battles on your land as well as others. However, now is the time for the next key step in expanding your empire, getting a new city.
There are many reasons why you should get another city. Cities can only expand so far and hold a certain amount of population; in order to train more troops and have more different strategy cities, it is key to get another city. As well as this, it is a good idea to spread yourself across the oceans in order to be a dominant figure.
There are different ways of getting another city as well. Some are harder than others, but those that often involve heavy fighting will get larger cities. These methods are Colonising, Conquering a Ghost and Conquering a Player.
Which method do you choose?
Colonising: Colonising is the process in which you establish a brand new city in an empty space (denoted by a grey flag. There are many advantages, which include not having to build your academy as much, only having to research colony ship and the fact you will not loose any troops by doing so. However, the disadvantages outweigh the advantages, as you'll only get a small city at the start and if you choose to colonise on a small, uninhabited island, you will not be able to farm.
| Osl112's Top Tip:
Personally, I never colonise for my second village. Its a waste of time building up a whole new village from scratch when you can get much bigger villages. However, it is completely up to you, though tend to steer away from this early option. |
Conquering a Ghost: Conquering a ghost is the process where you take over an abandoned village. Again, there are many advantages, such as not having to research so many technologies. However, the problem with conquering a ghost is that these "ghosts" maybe few and far between. Finding a large (3000+ point) ghost maybe even harder, so if you wish to conquer a ghost, look hard. Note that a ghost may still have left over troops in it, as well as not forgetting that these ghosts degrade over time, so don't think this is an easy option.
Conquering a Player Village: This is the hardest option, yet the most rewarding in the bounty you may gain (a huge new village and some battle points (points you gain from killing troops)). The big villages you could take ownership of are the key advantage though by doing so you risk furious battles and war (although it is fun).
It is a good idea to find a target whilst looking at these options.
Targets
There are many different villages to go for? Which one do you choose?
Firstly, colonising. You can colonise wherever you see a grey banner which maybe on another inhabited island or on one of those smaller islands. However, bear in mind that these smaller islands do not have farming villages and that you cannot farm from them. If you do wish to colonise, look for a grey banner in close proximity, try to get a polis close to allies and go for a big inhabited island rather than a small uninhabited island so that you can farm.
However, if you are looking for villages rather than banners, you'll need to scoot around a lot to find a good size village. If you are looking for a ghost (in the hope there is one near), use the mini map to locate grey dots and then investigate. If you are looking for player village, use the normal map and scroll around.
| Osl112's Top Tip:
There are a number of third party tools which can help you find your next polis. Check out Grepolis Victim Finder and Greutlis. |
The perfect target would be a village:
- With a decent size (definitely above 2500 points, preferably above 4000, though these expectations may change with others)
- Not owned by a larger Alliance or player (you don't want a diplomatic argument)
- Too far away or on the same island as you (1-2 islands away from you is good)
This criteria is usually a good one to follow. What you don't want is a 1000 point polis right next door to you on the same island, as you may struggle to expand. Although, if a larger village was on the same island as you, it may be a good option to take.
If you can't find a village you want to take in close vicinity, you may need to lower your criteria.
Culture Points
Also, whilst looking at targets, you need to know what Culture Points are. Culture points are effectively used to enhance the culture of your city, allowing you to influence and add more cities to your empire. The culture menu can be found in the last tab of the Agora.
If you have a certain amount of culture points, you can progress a cultural level which means you are able to conquer another city. Without a high enough culture level, you will not be able to influence another city enough to control them!
Culture points can be earned through the Agora a number of ways. You may perform a city festival, with the use of resources and an academy level 30. You may perform an "Olympic Games" event by using 50 Premium Gold and with an academy level 30. You may perform a battle procession, with every 300 battle points you get. Or you can do a theatre play, with a special building (explained in section 12).
You may be worrying if you don't have enough culture points or haven't got one yet. Well, don't; as your cultural level automatically starts at level 2, which allows you to conquer another city.
| Read More: |
Getting the Polis
Getting your next polis will take some strategy and teamwork. Your alliance mates are vital in helping you get your next polis, as they can provide precious support in attacking or defending the polis. It will also require some planning, so that you and your alliance can work efficiently and effectively. You do not want to be on your own, without any idea of the opponents troops or units.
There are two systems for conquering another players village; conquest and revolt. These change on different worlds, so be sure to check on the World Information page so that you can see whether your world is using the revolt or conquest system. Colonising and Conquering a Ghost doesn't change depending on the system.
Once you know your target, it is time to conquer! Scroll down to the correct section for you below.
Colonising
If you have taken the non-violent method of colonising, you will need the Academy level 22, Harbor level 20, a Warehouse level 20 (with ceramics), the technology Colony Ship (which allows you to build a colony ship), a Colony Ship and a high enough cultural level.
To colonise, it is as simple as clicking on the grey banner where you want to colonise. You'll need to send some land units and ships to escort the colony ship (don't forget transport ships to move the units; slingers cannot fly!) and then click establish city. It will take the time to get there plus 24 hours to colonise and create the new village. Then, you may start building it up!
| Read More: |
Conquering a Ghost
If you wish to conquer a ghost, you will need an Academy level 22, Harbor level 20, a Warehouse level 20 (with ceramics), the technology Colony Ship (which allows you to build a colony ship), a Colony Ship and a high enough cultural level.
To conquer a ghost, it is a good idea to know two key things. The first is that ghosts may still have units in from when the player whose village it was may of had units. The second is that these villages fall apart over time whilst uncontrolled, so that these building levels will continually lower until the village is nothing but ruins. Therefore, it is a good idea to act quick, so that you can save it from any unnecessary destruction and make it into a fully functioning, thriving village.
Conquering a ghost is slightly different to colonising. I advise spying first, as it is a good idea to see if there are any troops left remaining in the village. If there are, bear in mind that you will have to eliminate them.
Otherwise, getting a ghost is as simple as sending your colony ship with your chosen escort of units (land units with transport ships and other ships) to attack the village. Once your troops arrive, that ghost village is yours.
Conquering a Player (Using Conquest)
First of all, be sure you are using the right method as it changes on different worlds. Revolt is different to conquest significantly! If you are unsure, check on the World Information page.
Conquering a player is dangerous business. The player may call upon support from any number of allies, may have hidden troops or have massive defences. You never know!
| Osl112's Top Tip:
There are plenty of great guides on Conquest. Check out more step by step (and more tactical) guides such as this Darksunx guide or this segment from Cronus' guide. |
First of all, make sure you have got what is needed. You'll need an Academy level 28, Harbor level 20, Warehouse level 20 (with the research ceramics), the Conquest and Colony Ship researches, a Colony Ship and a high enough culture level.
Your first step should be to spy on the player. This is a definite, so you can see what the player has. Also, it can be a good measure of if this player is going to be a good conquer target or not. Remember the espionage tips though. If you fail at spying, you may have given away that you are planning to conquer him/her!
Following that, it is a good idea to make preparations. If you think you can go through with the conquer (it may not be easy, but when are you ever going to get an easy village), you should mention it to your alliance. Most good alliances have some kind of claiming method so that no one takes another's target. You also should get enough units to take out the village's troops (if you haven't already) and then take them out. This is commonly referred to as clearing. You may wish to do this as close as possible to the Colony Ship attack itself, to be sure you kill all troops.
In conquest, you take control of the city for 24 hours in which time your troops must hold out there. To start this 24 hour period, send your colony ship with a bunch of other units to the city. Bearing in mind that the player might get support, you should try to time a few clearing waves so that they arrive minutes before the colony ship does.
If your colony ship has landed successfully and defeated all enemy troops, your troops have temporary control over the village. Despite this though, you may not build anything. What you have to do during this 24 hour period is defend your colony ship from attack. Do this by supporting the enemy village with troops and asking your alliance members to do the same. If all of the land units or naval units in the village get destroyed, you will lost the colony ship and won't conquer.
If you survive 24 hours, congratulations! You should now have a new city. If you don't survive, there is always another time!
| Read More: |
Conquering a Player (Using Revolt)
First of all, be sure you are using the right method as it changes on different worlds. Revolt is different to conquest significantly! If you are unsure, check on the World Information page.
Conquering a player is dangerous business. The player may call upon support from any number of allies, may have hidden troops or have massive defences. You never know!
I prefer Revolt worlds more, its just a matter of opinion. Similar to Conquest, make sure you have got what is needed. You'll need an Academy level 28, Harbor level 20, Warehouse level 20 (with the research ceramics), the Conquest and Colony Ship researches, a Colony Ship and a high enough culture level.
| Osl112's Top Tip:
There are plenty of great guides on Revolt. Check out Priscilla's Guide. |
Similar to conquest, your first step should be spying, if you haven't already done so. This will give you a good idea at how easy/hard it will be to conquer, with the use of the simulator. Also remember the espionage tips.
Following your espionage, it is a good idea to prepare for battle. If you think you can go through with the conquer (it may not be easy, but when are you ever going to get an easy village), you should mention it to your alliance. Most good alliances have some kind of claiming method so that no one takes another's target. You also should get enough units to take out the village's troops (if you haven't already) and then take them out. This is commonly referred to as clearing. You may wish to do this as close as possible to the Colony Ship attack itself, to be sure you kill all troops.
In revolt, you have to send a special revolt attack which then creates (after 12 hours) a revolution in the polis. Once the revolution is created after 12 hours, you have a 12 hour period in which to send the colony ship. If your colony ship arrives in one piece, the polis is yours.
The first step in a revolt is to land a revolt attack. Choose your troops and ships to send, then select Revolt Attack towards the bottom of the screen. You do not need to send your colony ship now! From when the revolt attack lands (and if it lands successfully), the rumours start circling. This will take 12 hours, before the 12 hour period where you can land your colony ship and get the village occurs. You should really attack a couple of times whilst the revolt is being stirred, so that you make sure it is clear.
| Osl112's Top Tip:
As well as continually attacking the village, you should also spy a couple of times to see how clear the village is. During this 12 hour period, you should be building up troops and ships as well. |
More experienced players will land their colony ship as soon as the period of revolt starts. Make sure your timings are right and try to land your colony ship as early in the second period of 12 hours as possible as otherwise support may build up.
Once your colony ship lands (within the 12 hour period), congrats! If it survived, you should have the polis! If not, better luck next time, keep pushing for that second village.
| Read More: |
Being Conquered?
If you think you are being conquered, the first key step is not to panic! If you panic, you may make some mistakes which may lead to the loss of your polis. Again, the methods of defending are different in Conquest and Revolt systems. If you don't know what system your world uses, look it up on the World Information page.
Conquest
Check what signs there are. Have you had your troops wiped out a couple of times? Are there a lot of attacks incoming? Is there a really slow attack incoming? Clever players who are on at the time of the attack can work out from the time of the attack, which is the slowest unit. Try finding out, by using your map and the colony ship icon to see how long it takes for the colony ship to travel.
If you are being attacked, do not worry. Try to get your alliance to help out. Get them to send support just before the colony ship attack arrives and attacks just after the colony ship lands. Keep getting them to attack. If your alliance assists enough, you should be able to push the enemy out of your village.
| Read More: |
Revolt
Defending against a revolt is easier than defending against a conquest in my opinion as you have more control of your fate. Again, check what signs there are. Sneaky players may only start a revolt on you to scare you. However, you should take precautions nevertheless if you have a good size village which might be of interest to others.
For revolt, defend it as you would a normal attack. Try and get as much support as you possibly can from your alliance, as well as continue to farm yourself. Build up your walls and stock up on defensive troops, as when the time comes for a colony ship attack, you need to be as well prepared as possible.
Been Conquered?
Do not worry. You can restart the world, starting with the new players in the world. Then you may rebuild your polis and use your knowledge to overwhelm your opponents!
Congrats!
Congratulations, you should now have a new village! Build this up as you choose (using a strategy preferably) and start dominating your world!
| What to do now:
There are plenty of things to do now that you have more than one village, as well as some things that would be new to you. InterfaceNow that you have a new village, you may notice some new buttons which can be used at the top of your page. These can be used to switch village. Note that the village you are currently controlling is the one that has a circle around it. Special BuildingsYou may have noticed at the bottom of your Senate page that there are little boxes containing buildings all in a row. 4 on the left and 4 on the right. You may build these (one from each side) for little bonuses to make every village different! You may build one of these:
And you may build one of these:
You can build these through the senate as you would any building. Conquer!Now that you've conquered your first village, you should have a feel for conquering as well as some new tactics you may have gained from peers or from your own initiative! So, keep growing and gaining more villages so that you can become a god at Grepolis! World WondersFollowing that, you should also know how the Grepolis worlds end. After six months and the top 50 alliance being large enough, the era of world wonders begins! You must work with your alliance to own every spot on an island, then work with your alliance to build these World Wonders! It may take a little time and you will have attacks coming from everywhere, but thats the fun of it :) If you want to learn more, please read the World Wonders page. |


Final Word
I hope you liked this beginners guide. You should now know a lot about Grepolis; how to play, what everything means and how to advance. Now its up to you to learn the more advanced strategies, tactics as well as meet new friends and play with new people!
So, what did you think of the guide? You may show your appreciation on the forum here, by writing a comment or by giving some reputation here. Oh, and give a rating out of 10 please as well as ways this guide could be improved :)
Thanks for reading! ~Osl112